> ## Documentation Index
> Fetch the complete documentation index at: https://syteca.com/docs/llms.txt
> Use this file to discover all available pages before exploring further.
# Deploy the Windows Client Using Microsoft Intune
> Package the Syteca Windows Client as a Win32 app and deploy it remotely to devices enrolled in Microsoft Intune.
This deploys the Syteca Windows Client to devices managed through Microsoft Azure Intune, packaged as a Win32 app.
## Prerequisites
* Windows 10 version 1607 or higher.
* Devices enrolled in Intune, and either Azure AD registered, Azure AD joined, or Hybrid Azure AD joined.
* A [generated Windows Client installation package](/docs/administration/clients/parameters/one-time-passwords) containing `SytecaClient.exe`.
**In SaaS deployments**, download the installation package containing `SytecaClient.msi` instead of `SytecaClient.exe` — see [Getting started with a SaaS deployment](/docs/get-started/saas-deployment) for how to obtain it.
## Package the Client as a .intunewin file
Create an empty folder (for example `SytecaClientInstall`) and copy the downloaded `SytecaClient.exe` into it.
In SaaS deployments, use `SytecaClient.msi` instead.
Download and install the [Microsoft Win32 Content Prep Tool](https://github.com/microsoft/Microsoft-Win32-Content-Prep-Tool/archive/refs/heads/master.zip).
Create a second empty folder (for example `C:\output`).
Run:
```bat theme={"system"}
.\IntuneWinAppUtil.exe -c "C:\Users\Administrator\Desktop\SytecaClientInstall\" -s SytecaClient.exe -o C:\output
```
This produces `SytecaClient.intunewin` in the output folder.
## Create the Win32 app in Intune
In the [Microsoft Endpoint Manager Admin Center](https://endpoint.microsoft.com/), go to **Apps > All Apps**, click **+ Add**, and select **Windows app (Win32)**.
Click **Select app package file**, choose `SytecaClient.intunewin`, and click **OK**.
On **App information**, fill in **Name**, **Description**, and **Publisher** — available from the **Details** tab of `SytecaClient.exe`'s (or `SytecaClient.msi`'s) file properties.
On the **Program** tab:
* **Install command**: `SytecaClient.exe /ServerName= /TenantKey=tenantkey` (replace `` with the Syteca Server address, and `tenantkey` if applicable).
In SaaS deployments, use `msiexec /i "SytecaClient.msi" PROXY_HOST= SILENT_INSTALL=Y /quiet` instead.
* **Uninstall command**: `C:\Program Files\Ekran System\Ekran System\UninstallClient.exe /key=` (replace `` with the actual key).
* **Install behavior**: **System**.
* **Device restart behavior**: **No specific action**.
On the **Requirements** tab, set **Operating system architecture** to **64-bit**, and **Minimum operating system** to the Windows version used in your environment (for example Windows 10 1607).
On **Detection rules**, select **Manually configure detection rules**, click **+ Add**, and set:
* **Rule type**: **File**
* **Path**: `C:\Program Files\Ekran System\Ekran System`
* **File or folder**: `UninstallClient.exe`
* **Detection method**: **File or folder exists**
* **Associated with a 32-bit app on 64-bit clients**: **No**
Create an Azure AD Security Group containing the target users or devices. Add it under **Required** so the app installs automatically on enrolled devices.
Assigning by user deploys to every Azure-joined, Intune-enrolled device for that user. Assign by device instead to target specific machines.
On **Review + Create**, save the app. Intune uploads the `.intunewin` file and begins deployment.
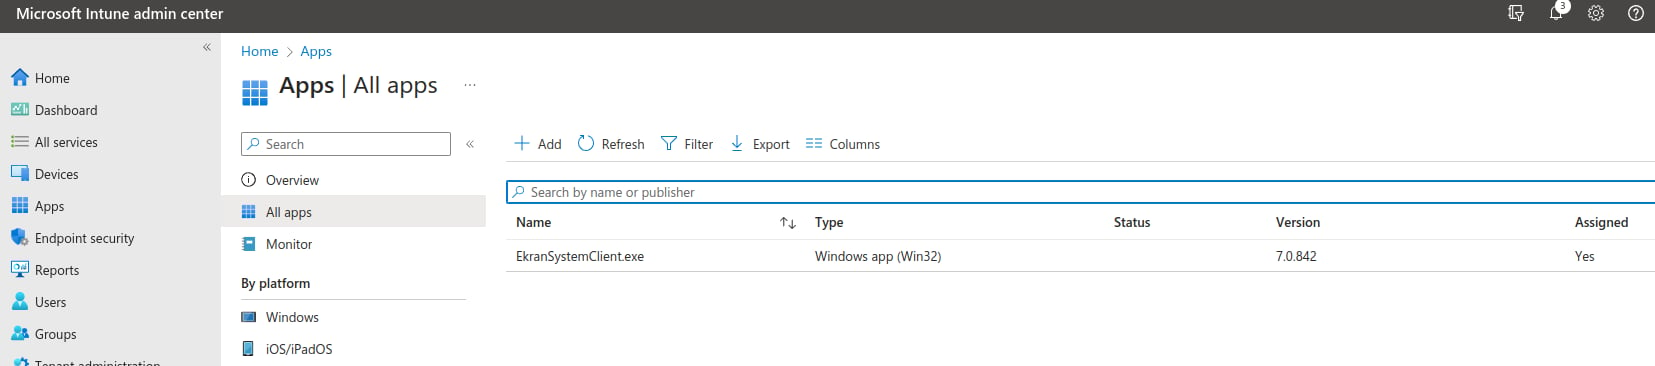
Once deployment completes, the app appears on the **All apps** tab and the Syteca Client is installed on the targeted devices.
 ## Related
Full Windows Client installation and configuration reference.
An alternative deployment approach for VDI/cloned images.
## Related
Full Windows Client installation and configuration reference.
An alternative deployment approach for VDI/cloned images.