

Everything here also works from the Management Tool using the Web Connection Manager, in a similar way.
As a root user, the built-in default admin user has the Owner Role Type for all secrets and can access every secret added by other users.
Connect in the Desktop Connection Manager
1
Sign in to the Client computer
Log in to the computer running the Connection Manager, remotely or locally. If secondary user authentication is enabled, enter the secondary user’s credentials.
2
Open the Connection Manager
Right-click the Client tray icon and choose Remote Access, or double-click the Syteca Remote Access desktop icon.
With a custom Windows shell, the Remote Access shortcut may not be on the desktop. Find it in
C:\Users\Public\Desktop.3
Find your secret
The Connection Manager shows the secrets and folders you have permission to use. Click Refresh any time to update the list. The Details column shows status for access approval, Password Checkout, and recording — the same statuses described in View and manage secrets.
4
Connect
Click the secret, then Connect. Request access approval if prompted.
5
Enter the computer (Active Directory only)
For an Active Directory account secret, enter the Computer name or IP in the pop-up, then click Connect.
If the secret only allows specific computers in the domain, expand the parent secret (click the down-arrow) to show one child secret per allowed computer, then select the child and click Connect.
A watchdog for the Connection Manager provides automatic recovery in case of failure.
Per-account-type notes
Each secret type connects to its kind of account, and most require a third-party application on the Connection Manager computer.- Active Directory
- Windows
- Unix (SSH)
- Unix (Telnet)
- Web
- MS SQL
Lets you choose which computer to connect to in the domain. Requires Microsoft Remote Desktop Connection (
mstsc.exe). After Connect, enter the computer name or IP; Syteca logs you in automatically.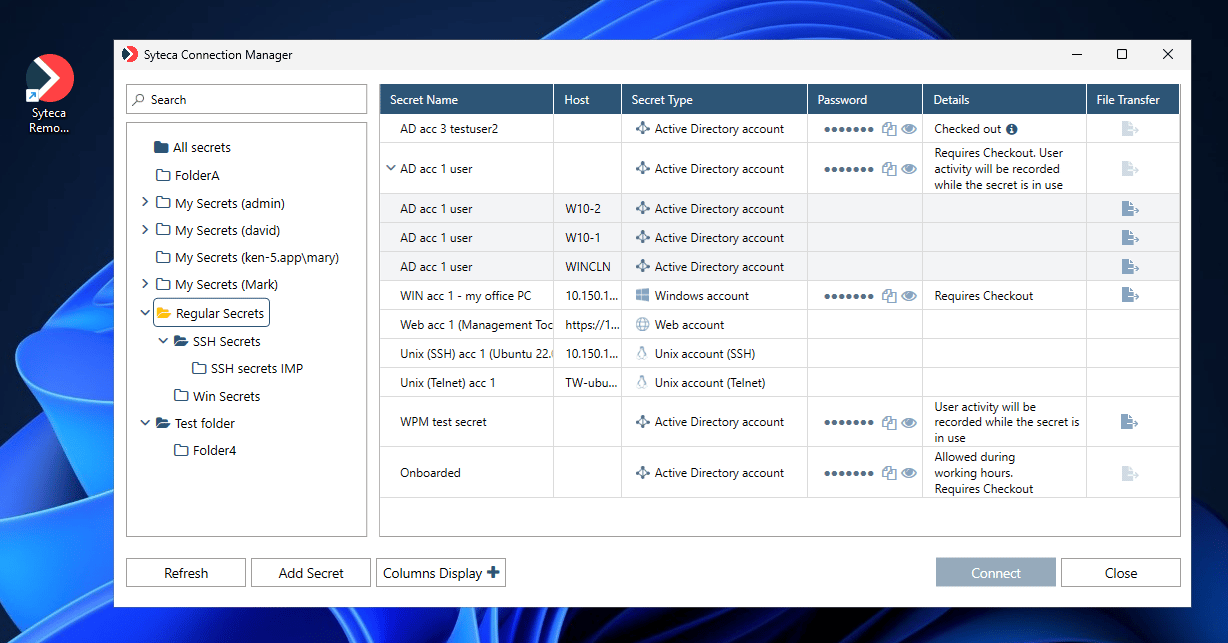
The Desktop Connection Manager showing available secrets.
Per-secret actions
If you have the right advanced permissions, each secret row also lets you:- Copy or view the password (after confirming your account password).
- Transfer files with WinSCP (dark blue icon; a gray icon means it isn’t fully configured).
Choose which columns are shown
Click Columns Display (bottom right of the Connection Manager) and select or clear columns. The Secret Name column can’t be hidden.Add your own private secrets (WPM)
Click Add Secret at the bottom of the Connection Manager to add and manage your own Workforce Password Management secrets — private to you unless you share them.Related
Web Connection Manager
Connect from the browser or locally, via the Management Tool.
View and manage secrets
The secrets grid, columns, and Details statuses.
Password checkout
What the Checked out / Requires checkout statuses mean.
Workforce Password Management
Manage your own private secrets.