

PATH environment variable on the Client computer.
When File Transfer is configured and permitted, a user transfers files through the secret in WinSCP instead of connecting directly to the remote computer.
This works in the desktop Syteca Connection Manager and, in a similar way, directly from the Management Tool using Syteca Web Connection Manager.
Supported secret types and protocols
Active Directory and Windows accounts: SFTP requires an OpenSSH server on the remote computer; FTP requires an FTP server on the remote computer.Unix account (SSH): SCP and SFTP require an OpenSSH server on the remote computer.
1. Configure file transfer for a secret
1
Open the secret
Sign in to the Management Tool with the Management Tool Access permission, then add a new secret or edit an existing one.
2
Set the protocol and port (Windows and Unix SSH only)
On the Details tab, in the File Transfer section, select the File Transfer Protocol (SFTP by default) and enter the Port (defaults:
22 for SFTP/SCP, 21 for FTP).For Unix account (SSH) secrets, the FTP protocol cannot be used together with the Use SSH key option.
For Active Directory account secrets, the protocol and port are configured later, in a pop-up shown while connecting through WinSCP (see Step 2).
3
Enable password rotation
On the Automation tab, select Enable remote password rotation and set the rotation frequency. See Remote password rotation.
4
Enable checkout options
On the Security tab, select both Requires check out and Change password on check in (and optionally Check in automatically after).
5
Grant File Transfer permission
On the Permissions tab, click Add, select the users or user groups, and for each set the Role Type to Owner or Editor and select the File Transfer checkbox. You can instead inherit users and the File Transfer permission from the parent folder (except “Root folder”).
6
Save and rotate once
Click Save. Then either wait for the first automatic rotation, or edit the secret and click Rotate Now on the Automation tab (Rotate Now appears only when editing an existing secret). Save again.
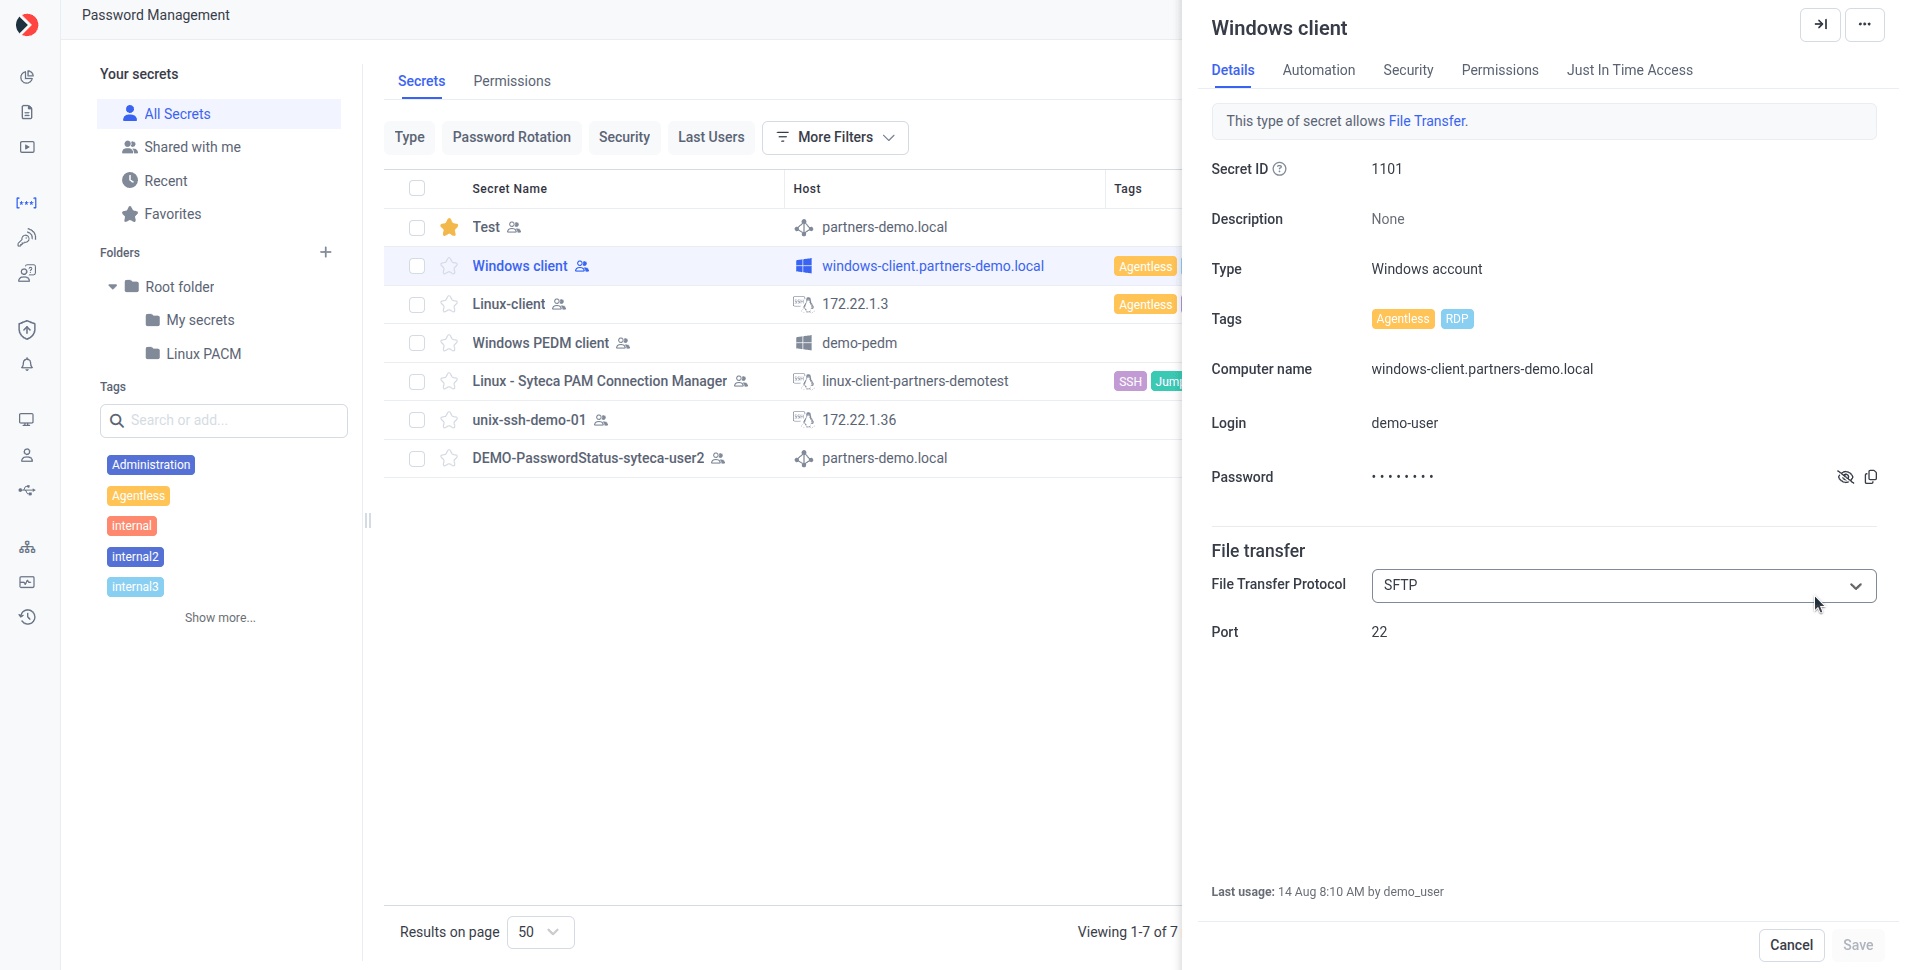
The File Transfer section on the Details tab.
2. Transfer files
1
Open file transfer
In Syteca Connection Manager, instead of Connect, click the dark blue icon in the File Transfer column for the secret. (A gray icon means file transfer isn’t fully configured for that secret and can’t be used.)
2
Enter connection details (Active Directory only)
For Active Directory account secrets, a pop-up opens: enter the remote computer’s name or IP, select the File Transfer Protocol and Port (or use the defaults), then click Connect.
If the secret only allows connections to specific computers in the domain, first expand the parent secret (click the down-arrow) to show its child secrets — one per allowed computer — then click the dark blue File Transfer icon on the row for the computer you want.
3
Transfer files in WinSCP
WinSCP opens (if version 6.0+ is installed) on the Client computer. Transfer files between the Connection Manager computer and the remote host in WinSCP.
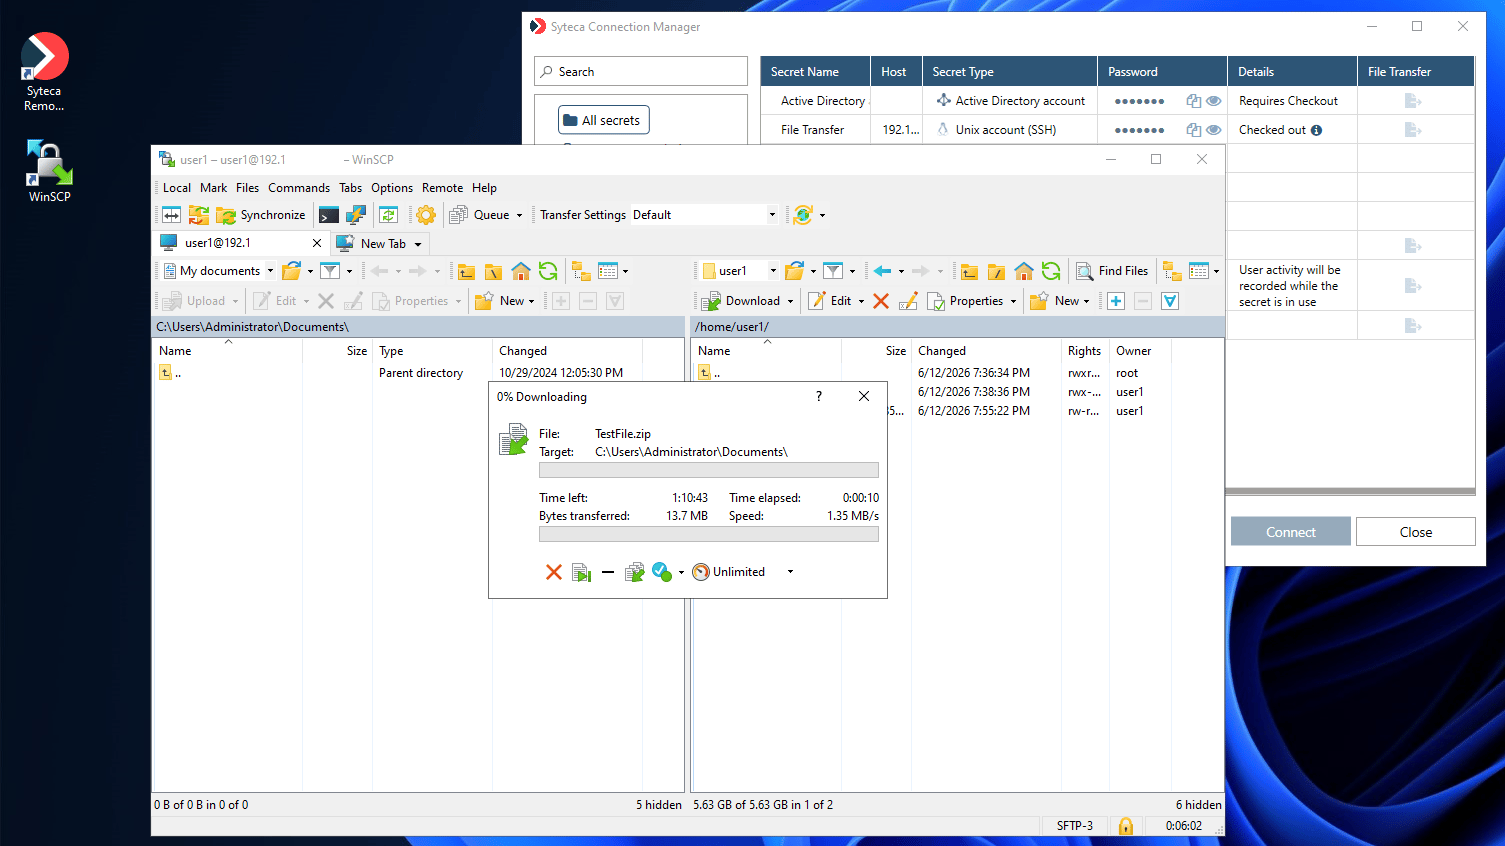
WinSCP opened through a Syteca secret, ready to transfer files.
Related
Add a secret
Configure file transfer while creating a secret.
Password checkout
Both checkout options are required for file transfer.
Remote password rotation
The password must be rotated once before file transfer works.
Permissions for secrets
The File Transfer advanced permission.